I continue about XF maps, where a custom renderer is needed if you want to customize appearance and interaction.
As most Xamarin forms samples about maps expose renderers for Droid and iOS (I did not see any about WP), I will start by exposing a sample for that 'missing' renderer. Another post will follow with some ideas about the renderers for the other platforms.
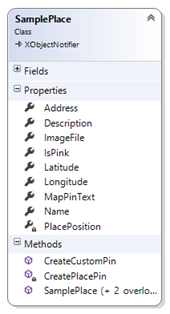
In this sample, we handle SamplePlace objects (see below) through our custom map and custom pin objects (see previous post)
What we want:
- Display custom pushpins (icons specified for each custom pin)
- When a pushpin is clicked, display a custom information callout about the place.
The way to do this:
The renderer (which derives from MapRenderer) receives our custom map, containing the map pins. The binding context of each Pin is set to the related custom pin. The place data is accessed through the custom pin's DataObject.
The renderer has two levels of duties:
- A 'formal' role inherited from the default renderer: create and display the specific platform map control, position the pins on it and define the interaction with the control's events (map taps / pins taps / callout taps…).
- A customization role: use our specific embedded information to customize pins' appearance and callouts.
The renderer code
Our renderer class:
public class iCustomMapRenderer : ViewRenderer<iCustomMap, Map>
For Xamarin.Forms.Maps to retrieve our renderer at runtime, it should be 'exported'. The code should now be like the following:
// Note: ExportRendererAttribute is defined in Xamarin.Forms namespace
[assembly: ExportRenderer(typeof(iCustomMap), typeof(iCustomMapRenderer))]

namespace iMaps.WinPhone
{
	public class iCustomMapRenderer : ViewRenderer<iCustomMap, Map>
	{
		private Map				_winMap;			// the win phone map control
		private iCustomMap		_xfMap;				// the xamarin forms map we are handling
		private iCustomPin		_selectedPin;	// our current slected pin

		// the callout user control that will display selected place info
		UserControl	_placeInfoCtrl	= new UserControl()
		{
			HorizontalAlignment	= HorizontalAlignment.Stretch,
			VerticalAlignment		= VerticalAlignment.Stretch,
			MinHeight			= 300,
			Background			= whiteBrush,
		};
		…
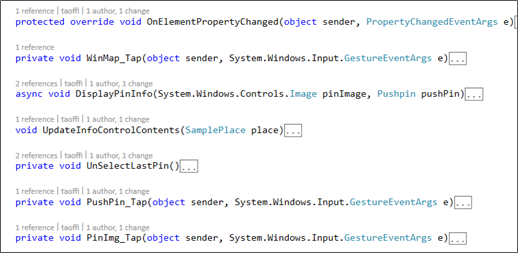
Here is a global view of the renderer's methods:
In the ElementPropertyChanged (override), we will:
- Create the win phone map control.
- Parse the received pins, and use their specified icons as pushpins.
- Subscribe to each pushpin Tap event to display the callout.
- Subscribe to the map Tap event to hide any displayed callout.
// Center the map on the 1st pin
var			pin	= _xfMap.Pins[0];

// create the win phone map control. set as the native control
_winMap		= new Map
		{
			ZoomLevel = 13,
			Center = new GeoCoordinate(pin.Position.Latitude, pin.Position.Longitude)
		};

this.SetNativeControl(_winMap);

// subscribe to map Tap event (to unselect last pin if any)
_winMap.Tap		+= WinMap_Tap;

// AddCurrentLocationToMap();
// loop through the received pins. display each with its custom pin icon
foreach (var formsPin in _xfMap.Pins)		//.CustomPins)
{
	var			pushPin		= new Pushpin();
	iCustomPin	customPin	= formsPin.BindingContext as iCustomPin;
	SamplePlace	place		= customPin == null ? null
										: customPin.DataObject as SamplePlace;

	// subscribe to the pushpin tap event (to display the callout)
	pushPin.Tap += PushPin_Tap;

	// set the pushpin position on the map
	var geoCoordinate			= new GeoCoordinate(formsPin.Position.Latitude, formsPin.Position.Longitude);
	pushPin.GeoCoordinate		= geoCoordinate;

	// set the pushpin tag to the custom pin
	pushPin.Tag					= customPin;
	…
	…
The custom pushpin icon
To put a UI element on the map, you create a MapOverlay containing the element on the desired location (geo coordinate) and you add that MapOverlay to a Layer that you put on the map.
A Pushpin (defined in Microsoft.Phone.Maps.Toolkit namespace) is a UI element that exposes a Content property (of type ContentControl) which we can set to our image of choice (the one specified by the custom pin object for instance). In that case, the pushpin would look like this:

We may also directly put our image on the MapOverlay. In that case that would be like this:

The callout control
Let us create a (win phone) xaml UserControl for displaying place object's information. We will use this when a pushpin will be tapped.
<Border x:Name="LayoutBorder" Background="Transparent" Height="auto" Padding="8" >
	<Grid VerticalAlignment="Top" Background="Transparent">
		<Grid.RowDefinitions>
			<RowDefinition Height="24" />
			<RowDefinition />
		</Grid.RowDefinitions>
		<Grid.ColumnDefinitions>
			<ColumnDefinition Width="24" />
			<ColumnDefinition />
		</Grid.ColumnDefinitions>

		<Image Source="{Binding Source, Source={StaticResource imgMapPointer}}" Grid.Column="0" Grid.Row="0" Stretch="Fill" Height="24" Width="24" HorizontalAlignment="Left" VerticalAlignment="Top" />

		<Border Padding="8" Background="White" Grid.Row="0" Grid.Column="1" Grid.RowSpan="2">
			<StackPanel>
				<Image x:Name="imgPlace" Height="128" Width="128" HorizontalAlignment="Left" Source="{Binding Converter={StaticResource placeImageConverter}}" Margin="8" />
				<TextBlock FontWeight="Bold" Text="{Binding Name}" Foreground="Black" />
				<Rectangle Height="1" Fill="Black" HorizontalAlignment="Stretch" />
				<TextBlock Margin="8,0" FontSize="14" Text="{Binding MapPinText}" Foreground="Black" />
			</StackPanel>
		</Border>
	</Grid>
</Border>
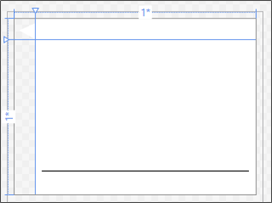
At design time, the code above would look like:
At runtime, the Pushpin Tap event handler will set the control's DataContext to the selected SamplePlace object. It will then display its image and information.
The pushpin Tap event handler determines the currently selected place (through the pushpin.Tag) and calls this method to update the control:
void UpdateInfoControlContents(SamplePlace place)
{
	_placeInfoCtrl.ClearValue(UserControl.ContentProperty);

	if(place == null)
		return;

	PlacePushPinInfoCtrl ctrl = new PlacePushPinInfoCtrl() { DataContext = place };

	_placeInfoCtrl.Content = ctrl;
}

There is certainly still much to do for these mechanics to produce something elegant and informative.
That may just be a good start.... Download the code and have more fun!
In a following post I will talk about some ideas for Droid and iOS map renderers (also included in the sample).